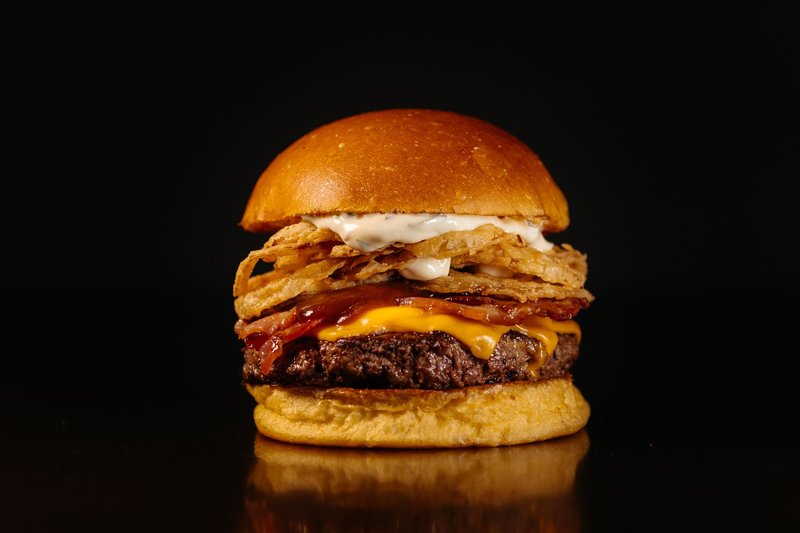
Juicy Lucy (Cheese Stuffed Burgers)
Prep: 15 mins | Cook: 10 mins | Total: 25 mins | Serves: ['4', '4 servings'] | Cuisine: American
I still remember the first time I bit into a Juicy Lucy—a cheese stuffed burger that oozed melty American cheese with every bite. It was at a cozy diner tucked away in a small town, and I was instantly hooked by the explosion of flavor. The combination of simple seasonings like Worcestershire sauce, garlic powder, and freshly cracked black pepper elevated the juicy beef to a whole new level. As I savored that first burger, all I could think was how easy it would be to recreate this delicious experience at home.
Now, I’m excited to share my take on this classic American dish, packed with flavor and budget-friendly ingredients. With just 1½ lbs of ground beef, some American cheese, and a few pantry staples, you can whip up these Juicy Lucy burgers in no time. Imagine serving them on toasted buns, each bite revealing that delightful cheese center—what a treat! So grab your apron, and let’s get ready to enjoy a diner-style meal that’s sure to impress.
Juicy Lucy (Cheese Stuffed Burgers)
Instructions
Step 1
To kick off making your Juicy Lucy burgers, let’s gather all the ingredients you’ll need. Start by collecting ground beef, cheese (American works wonderfully), your favorite burger seasoning, and any toppings you want to include like lettuce, tomatoes, and pickles. Don’t forget the burger buns!
Make sure to set everything out on your counter or a clean workspace. This way, you’ll have everything at your fingertips as you create these delicious stuffed burgers. We want to keep things smooth and fun as we move through the steps together. Once you have everything ready, we can dive into shaping those mouthwatering patties!
Step 2
To start, grab a large mixing bowl and add your ground beef. It’s important to use good quality meat for the best flavor, so choose a blend that works for you. Next, drizzle in the Worcestershire sauce, and sprinkle over the garlic powder, salt, and pepper.
Now, using your hands or a sturdy spatula, gently mix everything together until just combined. Be careful not to overwork the meat; you want to maintain that juicy texture. Once it’s all blended, set the mixture aside for a moment while you prepare your cheese filling. This step is key to making those deliciously gooey centers for your Juicy Lucy burgers!
Step 3
To get started, take your ground beef mixture and divide it into eight equal portions. Each portion should weigh about 3 ounces, so you can use a kitchen scale if you have one for accuracy, or just eyeball it if you’re feeling confident! Once you have your portions, roll each one into a ball using your hands. Don’t worry about making them perfect; just aim for a nice, smooth shape. These little beef balls are going to be the foundation for your juicy Lucy burgers!
Step 4
To start, take a piece of parchment paper or plastic wrap and lay it down on your work surface. Grab a portion of the seasoned beef and form it into a ball, about the size of a tennis ball. Place the ball on the parchment or wrap, then cover it with another piece of parchment or wrap to prevent sticking.
Now, using the bottom of a heavy skillet, gently press down on the ball to flatten it into a thin patty, making sure it’s about ¼ inch thick. Repeat this process for the remaining beef, creating a total of eight patties. You’ll want them to be evenly shaped, as this helps ensure they cook uniformly. Once you’re done, you should have a lovely set of thin patties ready to be filled with melty cheese!
Step 5
Now it’s time to create that gooey, cheesy center! Start by laying out four slices of American cheese in a fan shape right in the center of one of your burger patties. Make sure to leave a bit of space around the edges—this will help keep the cheese contained.
Next, gently place the second patty on top of the one with cheese. Now, here’s the important part: take a moment to pinch the edges of the patties together firmly. This seals them up tight, ensuring that all that melty goodness stays tucked inside while they cook. You want to make sure there are no gaps; think of it like a cozy little cheese blanket!
Step 6
To start, grab your medium-sized cast-iron skillet and pour in a couple of tablespoons of oil. Heat the skillet over medium heat until the oil becomes hot and starts to shimmer—this usually takes about 2-3 minutes. Once you see that beautiful shimmer, carefully place your cheese-stuffed patties in the skillet, making sure to leave some space between each one for even cooking. Now, resist the urge to move them for about 3 minutes; this is crucial for getting that fantastic golden crust that we all love. You’ll know they’re ready to flip when they easily release from the skillet.
Step 7
Once you've flipped your juicy Lucy, let it cook on the other side for about 3 minutes. Keep an eye on it as the cheese inside starts to melt and the outside develops a beautiful golden crust. You want the burger to reach an internal temperature of 160°F for perfect doneness, so if you have a meat thermometer, now's the time to use it. As it cooks, resist the urge to press down on the burger; we want to keep all that delicious melted cheese inside!
Step 8
Once your burgers have cooked to a beautiful golden brown and are perfectly juicy, transfer them to a plate and let them rest for about 5 minutes. This little break allows the flavors to settle and ensures that every bite is as delicious as possible.
While your burgers are resting, it’s time to toast those buns! In the same skillet you used for the burgers, keep the heat on medium. Add the burger buns, cut side down, and let them toast for about 2-3 minutes. Keep an eye on them; you want them to be golden and slightly crispy, which adds a wonderful texture to your juicy lucies. Enjoy that aroma filling your kitchen!
Step 9
Once your juicy Lucy burgers are perfectly cooked, it’s time to bring them to life with some delicious toppings! Start by slicing up some dill pickles; the tangy crunch complements the rich, melty cheese inside the burger beautifully.
Now, think about your favorite sauces—maybe some ketchup, mustard, or a zesty mayo? Gather those and set them out, along with the pickles, so everyone can customize their burger just the way they like it.
When you’re ready to serve, place each burger on a bun and add the pickles and sauces on top. You can even throw in some fresh lettuce or sliced tomatoes if you’re feeling fancy. Take a moment to admire your creation — that golden crust and oozing cheese are sure to impress! Enjoy every bite of your delicious, cheesy masterpiece!
Nutrition Information
calories: 702 kcal
fat: 49 g
carbohydrate: 23 g
protein: 39 g
fiber: 1 g
servingSize: 1 juicy lucy
My Tip
To achieve that deliciously gooey center in your Juicy Lucy, make sure to slightly overfill your burger patties with the quartered American cheese. When forming the patties, leave a little extra space around the edges to ensure the cheese doesn’t ooze out during cooking.
Leftovers
To store your Juicy Lucy leftovers, place them in a shallow airtight container in the fridge, where they'll stay fresh for up to three days. When you're ready to enjoy them again, reheat in a skillet over medium heat for about 5 minutes, flipping once, to keep that delicious cheese melty and the burger juicy.
Make It Your Own
For a delightful twist, try swapping the American cheese for pepper jack cheese to add a spicy kick to your Juicy Lucy. You can also mix in some diced jalapeños into the beef for an extra layer of flavor!


