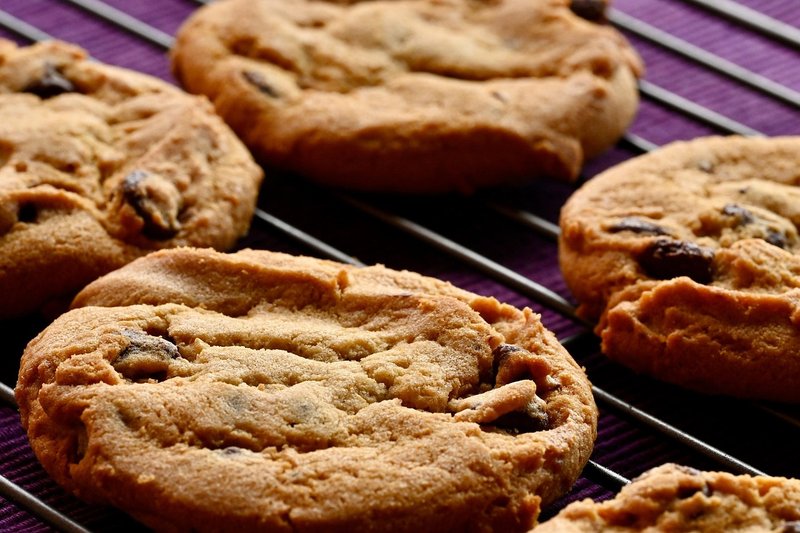
Chocolate Chip Cookies
Prep: 20 mins | Cook: 15 mins | Total: 1 hrs 5 mins | Serves: 30 cookies | Cuisine: american
Irresistibly chewy chocolate chip cookies await you! This easy recipe is perfect for a fun baking session with kids, transforming your kitchen into a delightful hub of sweet aromas and laughter. Forget about complicated techniques—this recipe skips the creaming and special equipment, making it accessible for bakers of all skill levels.
With just a handful of pantry staples like unsalted butter, dark brown sugar, and semisweet chocolate chips, you’ll whip up a batch that’s just as versatile as it is delicious. Imagine the joy of biting into a warm cookie, its golden crust giving way to gooey chocolate chunks—the ultimate comfort treat. And if you’re feeling adventurous, this cookie dough also shines as a rocky road bar cookie, offering endless possibilities for your sweet tooth.
In just 20 minutes of prep and 15 minutes of baking, you’ll have a plateful of homemade chocolate chip cookies that are bound to become a family favorite. Get ready to enjoy the sweet moments!
Chocolate Chip Cookies
Instructions
Step 1
To get started on your chocolate chip cookies, let’s prep your oven and baking sheets first. Begin by positioning two racks in the center of your oven; this helps ensure even baking. Preheat the oven to 375 degrees Fahrenheit, and if you have a convection setting, go ahead and use that for a perfectly crispy edge.
While the oven warms up, grab your baking sheets and line them with parchment paper or silicone baking mats. This will prevent your cookies from sticking and make cleanup a breeze. If you only have one baking sheet, don’t worry—just let it cool completely between batches to ensure your cookies bake evenly.
Step 2
To start, grab a microwave-safe bowl and place your butter inside. Cover it loosely with a microwave-safe lid or a paper towel to prevent any splatters. Microwave the butter on medium power for about 30 seconds to 1 minute, checking it halfway through to give it a little stir. You want it to be completely melted but not bubbling. Once it’s melted, set it aside to cool slightly.
In a large mixing bowl, combine the granulated sugar and brown sugar with the melted butter. Add in the eggs and vanilla extract, then whisk everything together until the mixture is smooth and well blended. You’ll know you’re on the right track when it looks glossy and uniform. This will be the base for your delicious cookies!
Step 3
In a separate bowl, start by whisking together your flour, baking soda, and salt until they’re well combined. This little mix is key to giving your cookies the right texture, so make sure there are no clumps. Once that’s done, gently fold the dry ingredients into your wet mixture using a wooden spoon. Be careful not to over-mix; you want just enough blending to bring everything together without losing that lovely tenderness. Finally, stir in your chocolate chips or chunks until they’re evenly distributed throughout the dough. At this point, you can already smell the deliciousness coming together!
Step 4
Once your cookie dough is ready, it’s time to form those delightful treats. Start by scooping generous heaping tablespoons of the dough and placing them onto your prepared baking pans. To give your cookies that classic round shape, slightly wet your hands and roll each scoop into a smooth ball.
Make sure to leave about 2 inches of space between each ball on the pans; they'll spread out as they bake. Preheat your oven to 350°F (175°C), then pop the pans in and let them bake for about 12 to 16 minutes. You’re looking for a beautiful golden brown color, but keep an eye on the centers—they should still feel soft to the touch. Once they’re done, use a spatula to carefully transfer the hot cookies to a cooling rack. Just wait until they cool a bit, and you’ll be in cookie heaven!
Step 5
Once your cookies have cooled completely on a wire rack, it’s time to think about storage. Grab a clean, airtight container — something that seals tightly to keep those delicious cookies fresh. Layer your cookies inside, making sure to separate any that might stick together with a piece of parchment paper.
Now, close the lid securely and store the container in a cool, dry place. Your cookies will stay wonderfully soft and tasty for up to five days, so you can enjoy a treat whenever the craving strikes! Just be sure to keep an eye on them; they might disappear faster than you think!
Step 6
To create the perfect Rocky Road Bar, start by preheating your oven to 350°F (175°C). While that heats up, take a moment to line a 9x13 inch baking pan with parchment paper, allowing some overhang on the sides for easy removal later. In a large mixing bowl, combine your melted butter and sugars, stirring well until the mixture is smooth and glossy. Next, add in the eggs one at a time, mixing until each is fully incorporated before adding the next. This will give your bars a lovely, rich texture. Once everything is well combined, gently fold in your dry ingredients until just mixed, being careful not to overwork the batter. You’re almost there!
Step 7
Once your cookies are baked to perfection and the edges are a lovely light brown, it’s time to take them to the next level. First, cool the pan slightly on a wire rack to let the cookies set. Then, carefully cover the surface with 4 cups of fluffy marshmallows and sprinkle 1 cup of chocolate chips evenly on top.
Now, preheat your broiler and position the oven rack about 8 inches from the heat source. Place the pan under the broiler and keep a close eye on it—this is where magic happens! Broil for about 2 minutes, rotating the pan frequently to ensure the marshmallows toast evenly. You want to see them turn a beautiful golden brown, but act fast, as they can go from golden to burnt in just a moment. Once toasted, pull the pan from the oven and let it cool slightly before cutting into squares. Enjoy every gooey, chocolatey bite!
Nutrition Information
calories: 161
fat: 7g
carbohydrate: 25g
protein: 2g
fiber: 1g
sugar: 17g
servingSize: 1 of 30 servings
My Tip
To achieve that perfect chewy texture in your chocolate chip cookies, let the melted butter cool slightly before mixing it with the sugars. This helps prevent the cookies from spreading too much while baking, giving you those delightful thick edges and soft centers.
Leftovers
To keep your chocolate chip cookies soft and delicious, store them in a resealable plastic bag or an airtight container at room temperature for up to a week. When you're ready to enjoy them again, pop them in the microwave for about 10-15 seconds to bring back that warm, gooey goodness!
Make It Your Own
For a delightful twist, try swapping out half of the all-purpose flour for oat flour to give your cookies a chewy texture and a subtle nuttiness. It’s a simple change that adds a lovely depth to your classic chocolate chip cookies!


