Easy Homemade Crepes
Prep: 10 mins | Cook: 15 mins | Total: 55 mins | Serves: ['6', '6 crepes'] | Cuisine: French
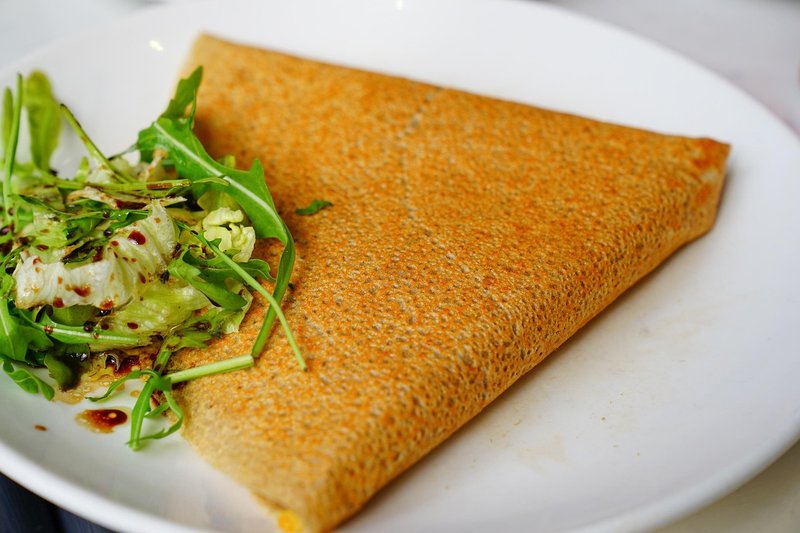
There’s something wonderfully versatile about crepes that makes them a must-have in your cooking repertoire, whether you're hosting a cozy brunch or treating yourself to a delightful dessert. This easy homemade crepes recipe will have you whipping up thin, delicate layers that are perfect for any filling you can dream up. With just a cup of all-purpose flour, a couple of large eggs, and some warmed milk, you’ll create a base that’s just waiting for your favorite sweet or savory additions.
Imagine filling these golden beauties with fresh fruit and whipped cream for breakfast or savory chicken and spinach for a satisfying dinner. The best part? It only takes about 10 minutes to prepare the batter, and in just 15 minutes of cooking, you’ll have a stack of delicious crepes ready to impress your family or guests. So, let’s embrace the art of crepe-making and savor every delightful bite of this easy homemade crepes recipe!
Easy Homemade Crepes
Instructions
Step 1
To get started on your crepe batter, grab a large mixing bowl and add in one cup of all-purpose flour along with a pinch of salt. Next, crack in two large eggs and whisk them together with the dry ingredients until well combined. Gradually pour in two cups of milk, followed by two tablespoons of melted butter and half a cup of water. Whisk everything together until the mixture is smooth and slightly thick, with no lumps in sight. You want that batter to be silky and easily pourable, perfect for creating those delicate crepes!
Step 2
After blending your crepe batter to a smooth consistency, it’s time to let it rest. This is an important step that allows the gluten to relax, resulting in tender crepes. Simply cover your bowl with a clean kitchen towel or plastic wrap and let it sit at room temperature for about 30 minutes. If you’re not ready to cook right away, feel free to pop it in the fridge instead; it can be stored there for up to two days. Just remember to give it a gentle stir before you start pouring the batter into the skillet—it might settle a bit while resting!
Step 3
To get started on your crepes, place a 10-inch skillet on the stove and set the heat to medium. This is the perfect temperature to ensure an even cook without burning. While the skillet warms up, grab a pastry brush and pour in about ½ teaspoon of oil. Once the skillet is hot—look for a shimmer on the surface—use the brush to lightly coat the bottom of the pan with the oil. This will help your crepes release easily and develop that lovely golden crust we’re aiming for.
Step 4
Once your skillet is heated and lightly greased, it's time to add the batter. Pour about ⅓ cup (80ml) of the crepe batter into the center of the skillet. As the batter hits the hot surface, quickly tilt the skillet in a circular motion. This will help the batter spread out evenly, creating a beautiful, thin layer that covers the entire bottom of the skillet. Keep tilting until the batter reaches the edges, which should take just a few seconds.
Now, let the crepe cook for about 1 to 2 minutes, or until you see the edges starting to lift slightly and the surface appears set. You’ll know it’s ready to flip when the bottom has turned a lovely golden brown.
Step 5
Once your batter is ready, heat your skillet over medium heat. You’ll know it’s hot enough when a drop of water sizzles on contact. Pour in about ¼ cup of the batter and quickly swirl the pan to spread it into a thin, even layer. Allow the crepe to cook for about 1 to 2 minutes, or until the edges start to lift and the surface appears mostly set.
Now comes the fun part—flipping! Using a spatula, gently lift one edge of the crepe and carefully flip it over. Cook the second side for an additional 1 to 2 minutes, keeping an eye out for that beautiful golden brown color. If it seems like it’s browning too quickly, don’t hesitate to adjust the heat down a notch. Remember, each skillet is a little different, so trust your instincts!
Step 6
Once your first crepe is done cooking, use a spatula to gently lift it from the pan and transfer it to a clean plate. If your pan looks dry, add a little more oil before pouring in the next ladle of batter. Pour just enough batter to cover the bottom of the pan in a thin layer, tilting the pan to help it spread evenly.
Cook the crepe for about 1 to 2 minutes, or until the edges start to lift slightly and the bottom is a lovely golden brown. Carefully flip the crepe using your spatula and cook for another minute on the other side. As you finish each crepe, stack them on your plate and cover them with a clean towel to keep them warm and soft. Repeat this process until you’ve cooked all the batter, creating a delicious stack of crepes ready for your favorite fillings!
Nutrition Information
calories: 216 kcal
fat: 13 g
carbohydrate: 18 g
protein: 6 g
fiber: 1 g
servingSize: 1 crepe
My Tip
For perfectly smooth crepes, make sure to whisk the batter until there are no lumps from the flour. If you notice any stubborn clumps, you can blend the batter briefly in a blender to achieve that silky texture before letting it rest.
Leftovers
To store your leftover crepes, stack them with parchment paper in between and place them in an airtight container in the fridge, where they’ll keep for up to three days. When you’re ready to enjoy them again, reheat in a non-stick skillet over medium heat for about 30 seconds on each side to bring back that lovely softness!
Make It Your Own
For a delightful twist, try swapping out the all-purpose flour for buckwheat flour to make gluten-free crepes. This will give your crepes a nutty flavor and a lovely, earthy color that’s perfect for both sweet and savory fillings!


